 OK
OKConference report
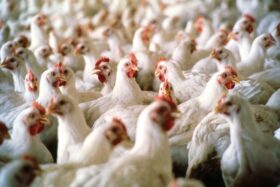
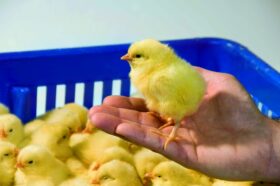
At the recent EW Nutrition Poultry Academy, Judy Robberts, Technical Service Manager, Aviagen discussed the management of broilers for growth & production efficiency. She noted that the first 7 days is the most critical period in the life of a broiler chicken. “In this period chicks are the most efficient at converting feed to weight, however, its digestive and immune systems are still immature, so you want to get your chicks off to the best possible start,” she said.
“Seven-day weights are a key KPI of the success of brooder management – chicks should weigh at least 4 times their initial body weight. Also, each 1 gram of bodyweight at 7-days of age is equivalent to 10 grams at 35-days.The goal of management during the first week is to ensure that chicks consume enough feed and water because chick weight at 7 days of age is strongly correlated to final body weight at slaughter,” noted Ms. Roberts.
To ensure chicks got off to the best start, her presentation included 6 essential factors for house preparation and brooder set-up for the successful placement of chicks:
Planning
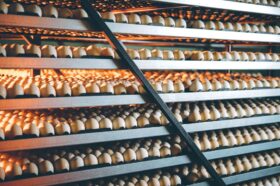
Planning should start well before chicks arrive on farm. The expected delivery date, time and number of chicks should be established with the supplier well in advance of chick placement. It is impossible to do the best possible chick placement if you do not know what you are going to receive, at least several days in advance. For example, the age and vaccination status of the donor flock. This will ensure that the appropriate brooding set-up is in place and that the chicks can be unloaded and placed as quickly as possible.
Chick placements should be planned so that chicks from different aged donor flocks can be brooded separately. Chicks from young donor flocks will achieve target body weights more easily if kept separate until the time of grading at 28 days of age.
Also, is the capacity of the equipment, such as feeders, drinkers, water pressure etc., capable of meeting the needs of the number of chicks to be placed? Do you have necessary supplies, such as chick paper, on hand?
Equipment test
- After cleaning and disinfection is completed, check that all water, feed, heat, ventilation, and lighting equipment is fully functioning and properly, adjusted for the needs of day-old chicks before the chicks arrive. Heaters should be checked and serviced before starting pre-heating.
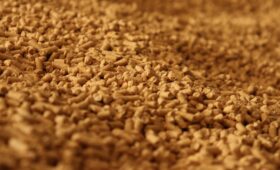
Litter and pre-heating
Chicks do not have the ability to regulate body temperature for the first 5 days and are not able to fully control their body temperature until about 14 days of age. They quickly become chilled if placed on cold litter, which hinders their search for feed and water. In case of floor rearing, bring in the litter after preheating the floor for at least 24 hours (commencing from when the floor is dry and depending on heater type and capacity, season and building insulation) before chicks arrive to allow the litter to reach 28-30°C. Floor temperature is more important than air temperature because chicks are in contact with litter via bare feet. If the floor is cold, chicks lose body heat to the floor through their feet and through their body when they sit down. Measure temperatures throughout the brooding area with a digital on the litter surface and approximately 2 cm above the litter, as this is where the chicks will be placed.
Litter should be evenly spread, and at least 5cm deep to provide adequate insulation from cold house floors. Air temperature will rise rapidly after the heat is turned on, but it takes much longer to thoroughly warm the mass of litter on the floor. Litter should have good moisture absorption and water holding capacity. Uneven litter can restrict access to feed and water and may lead to a loss in uniformity.
Preheating can ensure that the litter is properly dried prior to placement to reduce bacterial growth and ammonia production.
Brooding area set-up
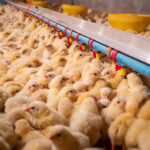
Allow an initial chick stocking density of 40-50 chicks/m2, do not give excess of floor space. The size of the brooding area will also be determined by the output of the heat source.
Light intensity should be30-40 lux, uniform and continuous for the first 48 hours to ensure chicks find food and water.
The use of a brooder guard is recommended for the first 5-7 days to confine chicks to near the heat source. The guard should be about 50 cm high. If made of solid material, such as cardboard, it can also protect the chicks from drafts. Brooders should be 2 m away from brooder edge.


Minimum ventilation set-up
Ventilation distributes heat evenly throughout the house and maintains optimum air quality in the brooding area. Minimum ventilation should begin with house preheating 24-48 hours prior to placement to remove waste gases and excess moisture.
Target that 24 hours before chicks arrive to achieve 28-30oC air and floor temperature, and relative humidity should be 60-70% when chicks enter the house to prevent dehydration. Humidity exceeding 70% limits the amount of evaporation, causing wet litter and excessive litter caking.
Young birds are very susceptible to drafts, so air speed in the brooding area (at chick level) should be less than 0.15m/second.
- Allow enough air exchange with a minimum ventilation rate at placement of 0.09m3/hour. Use a 5 minute fan cycle (with a thermostat override) – 30-45 seconds on.
- Make sure temperature and humidity sensors are placed correctly. For spot brooding, 2 meters away from the edge of each brooder, and for whole-house brooding at the center and two additional sensors at the end wall of the house. Sensors should not in contact with birds and out of direct lines with heating system.
Feed and water supply
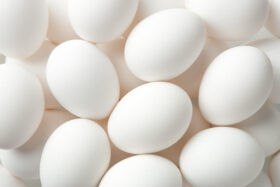
Starter feed should be ordered to ensure delivery 1-2 days before chick placement.
Once the chicks arrive, they need to begin drinking and eating as soon as possible. Poor quality crumble or pellets will result in reduced feed intake and poor performance. Feed distribution should minimize the physical deterioration in crumble and pellets. The amount of fine particles (<1 mm) in sieved crumbles or mini-pellet should be below 10%.
Turn on the mechanical feeding system and ensure all pans or chain feeders are filled. Automatic pan feeders should be buried into the litter, so chicks can easily access them.
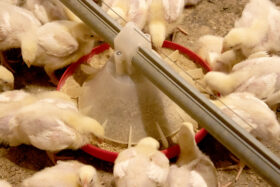
Spread a thin layer of starter feed onto chick paper to cover at least 80% of the paper area and fill any feeder trays 1-2 hours prior to chick arrival to prevent feed and water from becoming too hot. At least 20-30% of the total feed offered should be placed on paper. Paper should be positioned alongside the automated feed and drinking systems to aid in the transition from temporary to automated systems. Replenish feed on paper in small amounts given frequently. At placement, chicks should be placed directly onto paper, so that feed is immediately found.
If using paper, the feed area should cover at least 80% of the brooding area (avoid drinkers and feeders)

Never place supplemental feed or water directly under or near brooders. Ensure that supplementary feed never runs empty and always remains fresh.
Water is the most immediate need when chicks arrive at the house because they can easily dehydrate during hatching, processing, and transport to the farm. Chicks must have unlimited access to clean and fresh water (18-21°C). Cold water will chill the chicks.
- Flush drinkers 2-3 times to remove any remaining disinfectant. Remove dust and litter from cups. Adjust drinker line height to bird’s eye level. Ensure the placement of supplementary drinkers and feeders allows easy access for chicks and workers.
At placement, lower nipple drinkers to the chick’s eye level with sufficient water pressure to produce a droplet of water suspended from the nipple without dripping

Ms. Robberts concluded that “if house preparation is done properly then chicks are ready for a good start.” If there is any delay, it is always better that the chicks waits inside the truck (if its environmentally controlled) rather than getting cold waiting in the house. Chicks cannot become cold or heat stressed!”


 Brasil
 Colombia (ES)
 México (ES)
 United States
 Belgium (EN)
 Croatia (EN)
 Deutschland
 España
 Nederland (EN)
 Österreich (DE)
 Polska
 Россия
 Schweiz (DE)
 Türkiye
 Україна (RU)
 عربى
عربى Australia
 中国大陆
中国大陆 India (EN)
 日本
日本 Philippines (EN)
 ไทย (EN)
 Việt Nam (EN)