Optimizing DOC quality, part 1: The breeder perspective

Conference report

In the Poultry Academy held by EW Nutrition in the fall of last year, Judy Robberts, Technical Service Manager, Aviagen, explained that the success of a breeder flock depends on producing good quality hatching eggs with high hatchability and delivering first quality chicks. With this in mind, we have to ask two essential questions: What impact does the breeder farm have on chick quality? And What are the most overlooked areas for breeders?

Nest box hygiene

Nest

Nest

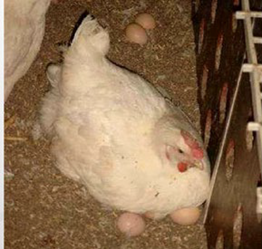
Nest box hygiene is key to good quality hatching eggs. Shortly after egg deposition, the eggshell is moist, and the cuticle is not yet an effective protection. In addition, during this period the egg is cooling down from the hen’s body temperature (41°C) to house temperature. Due to this process of cooling down, the content of the egg contracts and a vacuum is created in the egg. In compensation, air enters and forms the air cell. Together with this air, bacteria can easily penetrate the egg. For this reason, it is very important that only hatching eggs are used which have been laid in a clean nest.

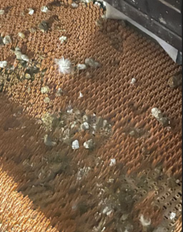
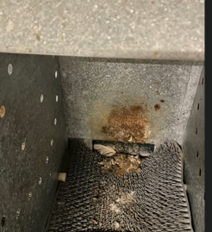
Maintaining a hygienic nest environment with routine cleaning of the nest mat or frequently replacing the bedding material will reduce the risk of bacterial contamination.

Clean nests and nesting equipment are essential to avoiding contamination.

Egg collection and pick-up schedule

Collect nest eggs a minimum of 4 times a day, more frequently in hot weather, as eggs cannot cool down sufficiently in the house to interrupt embryonic development. Adjust the exact timing so that no more than 30% (any more will increase the incidence of cracked eggs) of the eggs fall in any one collection. When determining collection times, it is important to remember:

  • The majority of eggs will be laid in the morning, and collection intervals should be managed accordingly.
  • Eggs left in the nest or on belts longer than recommended will have an increased incidence of being cracked or soiled.
  • Transition points on belts need to be smooth so eggs don’t pile up and bump into each other.
  • Never leave eggs overnight in the nests or belts.
  • Eggs left in conventional nests are subject to toe pecks or soiling from other hens.
  • Floor eggs (eggs that were laid outside of the breeder flock’s next boxes) should be collected more often than nest eggs.

It is not advisable to collect eggs in cardboard egg trays/flats, as the fiber material absorbs egg heat, and it takes longer for them to cool down. Because the fiber trays are porous, they can also harbor unwanted organisms/bacteria/fungi and attract vermin.

Ideally hatching eggs should weigh a minimum of 50 g from a flock at least 22 weeks of age. Smaller eggs from younger flocks may be used, however, chick size and early livability will not be optimum. Remember that a chick will yield approximately 68% of the egg size. Therefore, a small egg will produce a small chick.

Egg cleanliness

Always wash hands after collecting floor eggs and before each collection of nest eggs. Floor eggs should not be placed in the nest box – even if they appear clean. Washing floor and dirty eggs removes the eggs protective coating. Always remember, a washed egg is still a dirty egg, but a clean egg is one that was never dirty.

Eggs should be treated with chemical-based antimicrobials, as scraping, rubbing, or washing the eggshell will damage the cuticle and remove the physical and antimicrobial barrier. Since the eggshell permeability increases after 24 hours and makes the eggs more susceptible to bacterial invasion, eggs should be sanitized as soon as possible. The most popular method is fogging as it is safe, the fog reaches all the eggs and the eggs do not get wet.

Floor eggs are not hatching eggs

Floor Eggs

The hatchery cannot fix mistakes from the breeder farm. Therefore, it is NOT recommended to set floor eggs – eggs that were laid outside of the breeder flock’s next boxes. Floor eggs have a higher bacterial load than nest eggs and consequently lower hatchability. They are also potential ‘bangers, or exploders’ and can cross-contaminate other eggs, especially in the same incubator.

Selection of floor eggs must be done at the farm, so that a dirty egg never enters the hatchery. Where strictly necessary, set floor or dirty eggs only if the disadvantages of setting these eggs are fully understood and accepted by the hatchery. If floor eggs are used for hatching, they should be clearly marked and stored separately from the nest eggs so that the hatchery can manage the contamination risk appropriately.

Floor eggs have a significantly higher risk of microbial contamination that will reduce hatch and chick quality.

Egg hygiene – bacterial contamination

Egg condition Total Bacteria (cm2)
Newly laid 300
Cooled clean egg 3,000
“Clean” floor egg 30,000
Dirty egg 300,000

Monitor the number of floor eggs and adjust management practices to minimize them. Floor eggs are a problem that should be tackled at the breeder level, with good breeder management and suitable housing equipment. If levels of floor eggs exceed 2-3% across the life of the flock, there is a problem. Floor eggs will be much higher at the start of production, but by peak production should be down to 1-2%.

Cracked eggs

Eggs with cracks are more likely to become infected and have low hatchability and poor chick quality.

Influence of eggshell crack types on hatchability and chick quality

Treatment Egg weight at transfer (g) Weight loss (%) Fertility (%) Hatchability (%) Chick weight (g) Chick uniformity (%)
Normal 62.0a 11.4c 97.8a 83.9a 48.9a 82.6
Star cracks 55.6b 20.7b 89.4b 49.4b 48.2a 70.3
Hairline cracks 53.1c 24.0a 83.3c 30.0c 45.6b 70.2

Khabisi et al., 2011  a-c Means within a column without a common superscript differ significantly (p ≤ 0.05)

Do not set cracked eggs. Record the number of eggs with cracks, and if the frequency is unsatisfactory, investigate and eliminate possible causes.

On-farm egg storage rooms

Don’t forget that storage starts from the time of laying, not the time of receival at the hatchery.

Eggs need to be cooled below 24oC (threshold temperature or physiological zero) as soon as possible to stop cellular growth of the embryo, until the egg is set at the hatchery. This minimizes embryo mortality, maximizes hatchability and helps to ensure chick quality. Eggs should be stored within 4 hours after collection.

On breeder farms, eggs are usually stored until being transported to the hatchery. The storage duration depends on the egg room capacity, supply of hatching eggs, hatchery capacity, and demand for day-old chicks. Don’t forget that storage starts from the time of laying, not the time of receival at the hatchery.

If the farm has an environmentally controlled egg storage room, eggs can be collected by the hatchery at least twice a week. If the farm has no dedicated egg storage room, eggs must be transported to the hatchery daily. Uncontrolled fluctuations in egg storage temperatures will cause stop-start growth of the germinal disc, which will reduce hatchability.

The temperature of the farm egg storage room should higher than the egg transport truck and the egg transport truck temperature should be higher than the hatchery egg storage room. This consistent decrease in temperature is to prevent condensation (also referred to as sweating) on the eggs. Condensation on the eggshell impairs the natural mechanisms of defense and provide an ideal environment for bacteria grow, penetrate the shell, and contaminate the egg. Condensation on eggs is more common in hot and humid climates common throughout Asia.

Egg storage rooms are important, yet they are frequently overlooked. Areas to consider include:

  • Consistent temperature 24/7 (insulation will minimize variation),
  • Temperature alarm system – set for a maximum temperature of 21°C and a minimum of 16-18 °C,
  • Temperature and humidity sensor placement – don’t place in a direct line of temperature or humidity sources as this will lead to false readings,
  • Do not place sensors against walls,
  • Sensor accuracy (loggers are recommended),
  • Fans to evenly distribute air,
  • Do not place eggs directly against the wall or on the floor in the storage room to maximize air circulation and to ensure uniform conditions, and
  • Avoid direct air flow onto eggs from fans, room coolers and/or humidifiers, as this can increase moisture loss and cause temperature variation throughout the room.

The farm is the starting point to ensure chick quality. Attention to detail and hygiene throughout the whole process is critical. Through monitoring and auditing, areas with deficiencies can be identified and corrected to continue producing high quality hatching eggs.


Optimizing DOC quality, part 2: The hatchery perspective

CHICKS

Conference report

At EW Nutrition’s Poultry Academy in the fall of last year, Judy Robberts, Technical Service Manager, Aviagen discussed the impact of the hatchery on chick quality. The transportation and storage of hatching eggs, preventative maintenance, and day-old chick transport all play an essential role. If mismanaged, these areas can negate the benefits of money spent and improvements made at the breeder farm or even in the hatchery itself.

Egg transport from breeder farm to hatchery

The transportation of hatching eggs from the breeder farm to the hatchery is critical: clean and disinfect the truck prior to use, to prevent pathogen spread, and only use a truck that is dedicated to transport hatching eggs. Always transport eggs small end down to avoid loose air cells.

The temperature of the farm egg storage room should higher than the egg transport truck. This decrease in temperature is to prevent condensation (also referred to as sweating) on the eggs. Condensation on the eggshell impairs the natural mechanisms of defense and provide an ideal environment for bacteria grow, penetrate the shell, and contaminate the egg. Condensation on eggs is more common in hot and humid climates common throughout Asia. Even when on-farm egg storage and truck temperatures are equal, sweating can still occur during loading and unloading, especially on warm and humid days. In such a case, a higher on-farm storage temperature of 23°C instead of the generally recommended 18-20°C can be considered.

Avoid sudden temperature changes. Use temperature loggers during transport to record any temperature fluctuations. Take internal egg temperatures at different locations within each batch received at the hatchery, to check temperature conditions during transport. The relative humidity of the truck should be set at 65-70%.

Egg storage at the hatchery

Don’t forget that storage starts from the time of laying, not the time of receival at the hatchery. Egg storage rooms are important, yet they are frequently overlooked. Areas to consider include:

  • Consistent temperature 24/7 (insulation and fans will minimize variation),
  • Avoid condensation,
  • Do not place eggs directly against the wall or on the floor in the storage room, to maximize air circulation and to ensure uniform conditions,
  • Alarm systems – set for a maximum temperature of 21°C and a minimum of 16-18°C,
  • Sensor accuracy (loggers are recommended), and
  • Sensor placement – don’t place in a direct line of temperature or humidity sources as this will lead to false readings. Similarly, allow for air circulation, do not place sensors against walls.

Temperature and storage time

Hatchery

“The holding temperature should be based on storage time,” advised Ms Robberts. Eggs which are set within 4 days of lay don’t need to be kept at a temperature below 20°C; in this case 21–22°C is regarded as optimal. This relatively high temperature promotes the thinning of the albumen, which improves the gas exchange during early incubation. On the other hand, it is low enough to maintain the vitality of the embryo. Best hatches result from eggs 3–7 days of age. Storage for longer than 7 days will require cooler temperatures to help reduce the loss of hatch due to embryo cell death and decline in internal egg quality. If the storage period is less than 7 days a storage temperature of 16-18°C is advised and if the storage period is longer, a temperature of 10-12°C is mostly recommended. The eggs of young breeder flocks are better suited for prolonged storage periods than eggs of older breeder flocks, as albumen quality in eggs of younger breeder flocks is higher.

Differences in temperature will result in the eggs reaching incubation temperature at different times and, therefore, hatching at different times, increasing the hatch window.

Relative humidity

The egg storage room should have a relative humidity of 70-80% to prevent egg dehydration and to maintain internal egg quality. The humidity should be a fine mist, so the eggs do not get wet. Humidifiers should be maintained and cleaned regularly. Dirty humidifiers can be a significant source of bacteria and lead to egg contamination. Follow the same guidelines for trolley placement, spacing, and air circulation in the hatching storage room as the farm egg storage room. Likewise, the same recommendations apply for thermometer monitoring and placement.

Don’t forget the maintenance

Maintenance is often reactive, not preventative – things are only fixed when they break down. This can compromise hatchability and chick quality. A few things to consider when setting up a maintenance plan are:

  • Have a dedicated person responsible for maintenance reporting to the hatchery manager,
  • Produce a list of all the equipment to be maintained including frequencies,
  • Keep records on all performed maintenance,
  • Maintenance includes calibration of equipment,
  • Keep track of spare parts on hand, and
  • Include the building structure and ancillary equipment in the program.

Day-old chick transport

HatcheryTransport cannot improve the quality of the day-old chick, but it can certainly harm the chick’s welfare, growth, development and performance.

If chicks are transported outside their thermoneutral zone (32-35oC) they will start using up the nutrients from the yolk sac at a much faster rate to maintain their core temperature (40-41°C) . A core temperature above 41°C post-hatch will lead to panting resulting to water loss with the risk of dehydration and below 39.5°C will lead to reduced activity and low feed consumption. Adjust the number of chicks per box if optimal temperature inside the chick boxes cannot be achieved due to limitations in transport equipment.

Optimizing transport conditions for day-old chicks from hatchery to farm for is beneficial for subsequent performance.

Conclusion

The modern hatchery is a major investment, so it just makes sense to pay attention to detail to maintain hatching egg quality and produce high-quality chicks. Factors such as egg storage conditions, play a significant role in achieving maximum hatchability. Through monitoring and auditing, areas with deficiencies can be identified and corrected to continue producing high quality hatching eggs. The transport of day–old chicks from should ensure that the birds arrive at the farm in the same condition in which they left the hatchery.


Getting broilers off to a good start: House preparation

Temporary guards to confine chicks

Conference report

At the recent EW Nutrition Poultry Academy, Judy Robberts, Technical Service Manager, Aviagen discussed the management of broilers for growth & production efficiency. She noted that the first 7 days is the most critical period in the life of a broiler chicken. “In this period chicks are the most efficient at converting feed to weight, however, its digestive and immune systems are still immature, so you want to get your chicks off to the best possible start,” she said.

“Seven-day weights are a key KPI of the success of brooder management – chicks should weigh at least 4 times their initial body weight. Also, each 1 gram of bodyweight at 7-days of age is equivalent to 10 grams at 35-days.The goal of management during the first week is to ensure that chicks consume enough feed and water because chick weight at 7 days of age is strongly correlated to final body weight at slaughter,” noted Ms. Roberts.

To ensure chicks got off to the best start, her presentation included 6 essential factors for house preparation and brooder set-up for the successful placement of chicks:

Planning

Planning should start well before chicks arrive on farm. The expected delivery date, time and number of chicks should be established with the supplier well in advance of chick placement. It is impossible to do the best possible chick placement if you do not know what you are going to receive, at least several days in advance. For example, the age and vaccination status of the donor flock. This will ensure that the appropriate brooding set-up is in place and that the chicks can be unloaded and placed as quickly as possible.

Chick placements should be planned so that chicks from different aged donor flocks can be brooded separately. Chicks from young donor flocks will achieve target body weights more easily if kept separate until the time of grading at 28 days of age.

Also, is the capacity of the equipment, such as feeders, drinkers, water pressure etc., capable of meeting the needs of the number of chicks to be placed? Do you have necessary supplies, such as chick paper, on hand?

Equipment test

  • After cleaning and disinfection is completed, check that all water, feed, heat, ventilation, and lighting equipment is fully functioning and properly, adjusted for the needs of day-old chicks before the chicks arrive. Heaters should be checked and serviced before starting pre-heating.

Litter and pre-heating

Chicks do not have the ability to regulate body temperature for the first 5 days and are not able to fully control their body temperature until about 14 days of age. They quickly become chilled if placed on cold litter, which hinders their search for feed and water. In case of floor rearing, bring in the litter after preheating the floor for at least 24 hours (commencing from when the floor is dry and depending on heater type and capacity, season and building insulation) before chicks arrive to allow the litter to reach 28-30°C. Floor temperature is more important than air temperature because chicks are in contact with litter via bare feet. If the floor is cold, chicks lose body heat to the floor through their feet and through their body when they sit down. Measure temperatures throughout the brooding area with a digital on the litter surface and approximately 2 cm above the litter, as this is where the chicks will be placed.

Litter should be evenly spread, and at least 5cm deep to provide adequate insulation from cold house floors. Air temperature will rise rapidly after the heat is turned on, but it takes much longer to thoroughly warm the mass of litter on the floor. Litter should have good moisture absorption and water holding capacity. Uneven litter can restrict access to feed and water and may lead to a loss in uniformity.

Preheating can ensure that the litter is properly dried prior to placement to reduce bacterial growth and ammonia production.

Brooding area set-up

Allow an initial chick stocking density of 40-50 chicks/m2, do not give excess of floor space. The size of the brooding area will also be determined by the output of the heat source.

Light intensity should be30-40 lux, uniform and continuous for the first 48 hours to ensure chicks find food and water.

The use of a brooder guard is recommended for the first 5-7 days to confine chicks to near the heat source. The guard should be about 50 cm high. If made of solid material, such as cardboard, it can also protect the chicks from drafts. Brooders should be 2 m away from brooder edge.

Spot Brooder
Example of spot brooder layout

Temporary guards to confine chicks

Minimum ventilation set-up

Ventilation distributes heat evenly throughout the house and maintains optimum air quality in the brooding area. Minimum ventilation should begin with house preheating 24-48 hours prior to placement to remove waste gases and excess moisture.

Target that 24 hours before chicks arrive to achieve 28-30oC air and floor temperature, and relative humidity should be 60-70% when chicks enter the house to prevent dehydration. Humidity exceeding 70% limits the amount of evaporation, causing wet litter and excessive litter caking.

Young birds are very susceptible to drafts, so air speed in the brooding area (at chick level) should be less than 0.15m/second.

  • Allow enough air exchange with a minimum ventilation rate at placement of 0.09m3/hour. Use a 5 minute fan cycle (with a thermostat override) – 30-45 seconds on.
  • Make sure temperature and humidity sensors are placed correctly. For spot brooding, 2 meters away from the edge of each brooder, and for whole-house brooding at the center and two additional sensors at the end wall of the house. Sensors should not in contact with birds and out of direct lines with heating system.

Feed and water supply

Starter feed should be ordered to ensure delivery 1-2 days before chick placement.

Once the chicks arrive, they need to begin drinking and eating as soon as possible. Poor quality crumble or pellets will result in reduced feed intake and poor performance. Feed distribution should minimize the physical deterioration in crumble and pellets. The amount of fine particles (<1 mm) in sieved crumbles or mini-pellet should be below 10%.

Turn on the mechanical feeding system and ensure all pans or chain feeders are filled. Automatic pan feeders should be buried into the litter, so chicks can easily access them.

Spread a thin layer of starter feed onto chick paper to cover at least 80% of the paper area and fill any feeder trays 1-2 hours prior to chick arrival to prevent feed and water from becoming too hot. At least 20-30% of the total feed offered should be placed on paper. Paper should be positioned alongside the automated feed and drinking systems to aid in the transition from temporary to automated systems. Replenish feed on paper in small amounts given frequently. At placement, chicks should be placed directly onto paper, so that feed is immediately found.

If using paper, the feed area should cover at least 80% of the brooding area (avoid drinkers and feeders)

Papered Feed Area
Papered Feed Area

Never place supplemental feed or water directly under or near brooders. Ensure that supplementary feed never runs empty and always remains fresh.

Water is the most immediate need when chicks arrive at the house because they can easily dehydrate during hatching, processing, and transport to the farm. Chicks must have unlimited access to clean and fresh water (18-21°C). Cold water will chill the chicks.

  • Flush drinkers 2-3 times to remove any remaining disinfectant. Remove dust and litter from cups. Adjust drinker line height to bird’s eye level. Ensure the placement of supplementary drinkers and feeders allows easy access for chicks and workers.

At placement, lower nipple drinkers to the chick’s eye level with sufficient water pressure to produce a droplet of water suspended from the nipple without dripping

Droplet Drinking
Droplet Drinking

Ms. Robberts concluded that “if house preparation is done properly then chicks are ready for a good start.” If there is any delay, it is always better that the chicks waits inside the truck (if its environmentally controlled) rather than getting cold waiting in the house. Chicks cannot become cold or heat stressed!”


Effects on Performance and Gut Health of Ventar D Supplementation in Broiler Diets

Summary of study by Necmettin Ceylan, Sait Koca, Nejla Kahraman, Ankara University, Faculty of Agriculture, Animal Science, 6110 Ankara/Türkiye

The study conducted by Dr. Celyn et al. in 2023 focused on the impact of Ventar D supplementation in broiler diets on growth performance and gut health. The trial was carried out over six weeks on Ross 308 broiler chicks, comparing a control group with an experimental group supplemented with Ventar D. The trial feed was based on corn, soybean meal, wheat, sunflower meal, and poultry oil.

Key Findings

Growth Performance: The study demonstrated that Ventar D supplementation significantly improved body weight gain, feed consumption, feed conversion ratio (FCR) and EPEF during the starter, grower, and finisher periods. The overall performance of chickens fed with Ventar D was notably better, showing a 6.5% higher body weight and 1.67% better FCR compared to the control group.

Treatments BWG, g FCR Corrected FCR2565 FI, g Mortality,% EPEF
Control 2520.6a±32,77 1.620a±0.006 1.629a±0.011 4082.2a±46.77 3.25±0.28 367.2a±5.18
Ventar D 2684.3b±23.65 1.593b±0.010 1.568b±0.015 4273.9b±19.89 2.75±0.53 399.8b±4.35

Different letters indicate significance; P ≤ 0.05

Liver Enzymes: The addition of Ventar D led to a significant decrease in serum Alanine aminotransferase (ALT) levels

Treatments ALP ALT
Control 286.70±54.98 1.505a±0.390
Ventar D 301.50±87.19 0.832b±0.181

Different letters indicate significance; P ≤ 0.05

Gut Health: Ventar D supplementation resulted in higher concentrations of short-chain volatile fatty acids (SCVFA) in the cecum.

  Acetate Propionate Butyrate Isobutyrate Valerate Isovalerate BCFA Total SCFA
Control 27.22a±1.26 8.21±0.38 7.24a±0.41 0.848±0.078 0.964±0.043 0.881±0.054 2.69a±0.12 45.36a±1.53
Ventar D 30.51b±0.80 9.36±0.56 8.86b±0.44 0.878±0.070 1.121±0.077 0.993±0.031 2.99b±0.08 51.73b±1.32

Different letters indicate significance; P ≤ 0.05

Conclusion

Considering the results summarized in the tables above according to the feeding phases and the overall study (0-41 days): Ventar D supplementation of broiler feeds at the level of 100 g/ton significantly improved growth performance parameters during the starter, grower and finisher periods (P ≤ 0.05), and in the final results was stable at 6.5% higher BW and 1.67% better FCR compared to the control group. European Production Efficiency Factor (EPEF) was also significantly better than the control group (P ≤ 0.05).

In the study, liver enzyme and the concentration of short-chain volatile fatty acids also improved significantly with the addition of Ventar D, which may be attributed to the gut health related mode of action for Ventar D.


Low Crude Protein Diets in Poultry: Understanding the Consequences

BROILER

Conference report

The concept of feeding poultry, specifically broilers and layers, with reduced crude protein (CP) diets is gaining traction among nutritionists. The economic implications of balancing amino acids currently dictate dietary CP levels. At the recent EW Nutrition Poultry Academy in Jakarta, Indonesia, Dr. Steve Leeson, Professor Emeritus at the University of Guelph, Canada, raised a crucial question: “What does ‘low CP’ really mean?” He states that it typically means a reduction of maximum 2-3% relative to current CP levels.

Low CP diets generally involve a decrease in soybean meal, compensated by higher grain content. This change increases dietary starch and decreases dietary lipid levels. To meet nutritional needs, these diets also include higher amounts of crystalline (synthetic) amino acids.

Dr. Leeson outlined the advantages and disadvantages of low CP diets. Positives include improved gut health due to reduced proteolytic bacteria, less environmental pollution, lower water intake (improving litter quality), improved sustainability indices, increased dietary net energy, and better performance during heat stress. Negatives encompass issues like lower pellet quality, altered dietary electrolyte balance, higher diet costs, reduced growth rate and feed efficiency, and increased abdominal fat deposition. There are also questions about the presumed complete utilization of crystalline amino acids, which can be as high as 25kg/MT in these diets.

Challenges with Low CP Diets

  • Protein vs. Amino Acids: Diets are typically formulated based on digestible amino acid content, though minimum CP levels remain common, to avoid reduced performance: Dr. Leeson noted that broiler diets with less than 19% CP in starter and 15% in finisher phases, and layer diets below 13% CP, often fail to deliver adequate performance, regardless of digestibly amino acid supply.
  • Utilization of Free Amino Acids: The crystalline amino acids are immediately absorbable in the small intestine, contrasting with protein-bound amino acids that are absorbed as di- and tri-peptides. Amino acids absorption dynamics and endogenous loss of amino acids are affected by (high) levels of  crystalline amino acids.
  • Non-Essential Amino Acids: The impact of reduced CP on animal performance might be related to the lower levels of presumed non-essential amino acids, e.g. glycine and serine.  This is an area for further exploration.
  • Energy Level Considerations: Dr. Leeson suggests maintaining specific ratios of digestible lysine to apparent metabolizable energy in broilers at different growth stages. The heat increment of CP is an essential factor, as it reduces net energy efficiency, possibly requiring an adjustment in amino acid to metabolizable energy ratios as poultry diets are not based on net energy values.
  • Gut Health: Lower CP levels can reduce the flow of undigested protein into the hindgut, reducing the risk of necrotic enteritis, and the production of harmful metabolites, like biogenic amines.
  • Role of Proteases: Protease use can lead to a further 2-4% reduction in dietary CP, with the response depending on the inherent protein digestibility of the diets.
  • Impacts on Pellet Quality: Due to the binding properties of protein, each 1% reduction in CP typically results in a 2% decrease in pellet durability (index).
  • Electrolyte Balance: Reduced CP can significantly lower dietary electrolyte balance, which has to be considered in feed formulation. Amongst the nutrients contributing to DEB value, Sodium and Potassium appear to be the most influential minerals to consider.

Conclusion

Dr. Leeson anticipates that low CP diets will become increasingly relevant. They have the potential to reduce environmental pollution and dependence on soybean meal, despite current challenges in reducing feed costs.


***

EW Nutrition’s Poultry Academy, featuring Dr. Leeson, took place in Jakarta and Manila in early September 2023. With nearly 50 years of industry experience, Dr. Leeson has made significant contributions to poultry nutrition and management, evidenced by his numerous awards and over 400 published papers.


Endotoxins in 250 words

E coli

Dr Inge Heinzl, EW Nutrition

Endotoxins are… toxic, of course. The part “endo” in their name means that they are part of the bacterial cell, or, to specify it, they are part of the outer membrane of Gram-negative bacteria such as E. coli, Salmonella, Shigella, Klebsiella, and Pseudomonas.

When do they occur?

Always. Endotoxins are released with the lysis of bacteria, e.g., at the end of their life cycle, due to the effective immune defense of the host or treatments. The other possibility is bacterial growth as the membrane gets restructured and the endotoxins (or lipopolysaccharides -LPS-) are liberated.

What is the problem?

The “normal” occurrence (animals and humans always have Gram-negative bacteria in their gut) does not matter, because gut cells do not have receptors to recognize them as a danger in their apical side. However, when the barrier function is compromised, they pass into the bloodstream.

The liver still detoxifies small amounts. The problem comes with higher amounts of endotoxins in the bloodstream. Then, they provoke a strong immune reaction, feed intake drops, and nutritional resources are shifted from growth and production to immunity. These performance drops affect the profitability of the farmer.

What can be done?

Use broad-spectrum toxin binders that

    • contain clay minerals showing high affinity and selectivity against endotoxins
    • contain yeast cell walls, which, in addition to their binding capacity, support the immune response through macrophage activation and are involved in modulating microflora and bacterial load from the intestine
    • provide adequate liver protection.


Housing and management strategies to mitigate heat stress in layers

Hühner

Dr Daniel Valbuena, Global Manager of Technical Services, Hy-Line International – Conference Report

Heat stress is one of the major environmental stressors in the poultry industry, especially in regions with high temperatures and high humidity. In EW Nutrition’s Poultry Academy in September, the topic was approached in a comprehensive and practical presentation.

A layer’s normal body temperature is about 40° C. Hens are comfortable with an ambient temperature 18° C to 24° C. When that temperature gets above 32° C, the more serious consequences of heat stress occur.

To mitigate the negative effects of heat stress on bird welfare, production, and profitability, essential best practices include those listed below.

Ventilation

Airflow at the birds’ level is key to removing bird heat. Naturally-ventilated barns are particularly at risk of heat stress. Increase the movement of air in open houses with stir fans. Ensure a minimum velocity of 1.8–2 meters/second in the bird areas.

Clean and ensure function of fan louvers. Fan belts should be tightened or changed to avoid slipping or breaking during periods of high temperature. Poorly maintained fans will operate at 50% reduced efficiency.

Air inlets must be adequate to supply the airflow needed to ventilate the house during warm weather. Inadequate inlet space will throttle down the fans and decrease airflow. Inlets should be kept clean and free of anything that might restrict the flow of incoming air. Use baffle boards to direct incoming air onto the birds. Thermostats should be checked for accuracy. An auxiliary power system must be in place in case of a power outage during hot weather.

In addition to running fans throughout the day when it’s hot, fans should run overnight and early morning to bring in cooler air. Air inlets should be adjusted to achieve uniform airflow throughout the building.

In houses equipped with evaporative cooling systems, the pads should be cleaned or replaced when they become clogged. Water flow over the pads should be uniform with no dry areas. Air will flow preferentially through dry areas since there is less resistance. Clean spider webs and dust from window screens frequently to improve ventilation inside the house.

Fans
Fans increase air velocity within the house and create a cooling effect.

Foggers

Fogging or misting is effective at low humidity (<60% relative humidity). Excess moisture in the air from using foggers or misters at high humidity can worsen heat stress conditions.

Foggers or misters need to be checked routinely and should run about 2 minutes out of every 10 if the humidity is low, however, run times can be adjusted based on house temperature and humidity. Fogging the inlet air in negative pressure ventilation systems has a good cooling effect.

Fogging systems should have water filters (to keep nozzles from clogging) and have a positive shutoff to prevent dripping causing wet litter.

Foggers
Foggers should mist, not irrigate, and not operate if the humidity exceeds 60%.

Roof design and cooling

Insulated roofs (R28 is recommended) reduce the radiation and conduction of solar heat through the roof to the interior of the house. Reflective roofing materials or light-coloured materials are recommended.

Ensure to provide ridge vents at roof level to allow hot air to exit so that fresh air may enter the house through side openings. The roof should have an overhang (minimum 60 cm) to reduce direct and indirect sunlight getting into the house.

Thatching can provide cost-effective insulation, but may need to be replaced every few years, and is difficult to clean, and may harbor vermin.

Shade Netting

Thatching

Use of shade netting (left) or thatching material such as palm fronds, paddy straw, corn stalks, sugarcane tops (right) to reduce solar heating of the roof.

Using roof sprinklers during times of extremely high temperature can remove heat from the roof and cool the inside of the house.

Curtains

Adjustable, porous side-wall curtains can be used control the flow of air into the house, and protect birds from direct, hot winds. Water dripping onto side curtains can reduce the house temperature.

Window Shades
Porous window shades block direct sunlight from entering the house but allow air to pass through.

Bird handling

Management practices that require bird handling, such as beak trimming, transfer, and vaccinations, should be done in the early morning hours, or in the evening, when it’s not so hot. Heat-stressed birds have decreased immune function and may not respond as well to vaccination. Alternatively, if birds are panting, they may breathe in too much of a spray vaccine or ingest too much of a water-administered vaccine. In both situations, birds may exhibit signs of the disease that the vaccines are intended to prevent.

Stocking density

It’s critical not to overstock cages. If stocking density is high, the radiant heat between the birds accumulates and the temperature increases. Birds need to be able to spread their wings to increase airflow around their bodies. Caged birds are more susceptible to heat stress because they are unable to seek a cooler place and there is less opportunity for conductive heat loss in cages. The temperature within a cage can be much higher than the measured air temperature in the walkway. Increased air velocity within the cages increases the convective heat loss and removes trapped air between birds.

Manure management

Manure allowed to accumulate reduces ventilation in cages. Remove manure from the house before the hot season, if practical. Heat produced during the decomposition of manure contributes to the heat load in the house. The presence of large amounts of manure in shallow pit houses or under cage batteries restricts the movement of air.

Be prepared and anticipate

  • The key to minimizing the effects of heat stress is to be prepared and anticipate periods of high environmental temperatures, and implementing appropriate management measures prior to the rise in temperatures. Implement cooling systems, such as evaporative cooling pads, misting systems, or fans. Provide natural or artificial shading within the layer house to reduce direct sunlight exposure. Shade structures, curtains, or baffles can help protect the hens from excessive heat.
  • Farm personnel should be trained to recognize and respond to heat stress promptly. You should also have an emergency plan in place for extreme heat events.


Feed and water management strategies to mitigate heat stress in layers

LAYER IMGP

Dr Daniel Valbuena, Global Manager of Technical Services, Hy-Line International – Conference Report

Feed and water management strategies are essential to help mitigate the negative effects of heat stress on bird welfare, production, and profitability. In EW Nutrition’s Poultry Academy in September, the topic was approached in a comprehensive and practical presentation.

Feed management

Feed consumption of the flock should be closely monitored during hot weather. It is important to rebalance the diet for critical nutrients, particularly amino acids, calcium, sodium and phosphorous according to the birds’ productivity demand (i.e., stage of production) and the observed feed intake. Insufficient amino acid intake is the primary reason for productivity loss during hot weather. Several strategies may be employed to help to manage elevated temperatures and maintain higher levels of feed intake:

  • Withdrawing feed from birds 6 hours before peak hot temperatures in the afternoon can lower the risk of heat stress. Encourage as much consumption as possible in the early morning or evening. Using lighting for midnight feeding encourages feed intake.
  • One third of the daily feed ration should be given in the morning and two thirds in the late afternoon. An additional advantage is the availability of calcium in the digestive system during shell formation at night and in the early hours of the morning. This will improve shell quality and reduce the birds from depleting bone calcium.
  • Normally a maximum 1 hour for feeder clean-out time is recommended, but this can be extended to 3 hours when the temperature exceeds 36°C.
  • Consider adding a 1-2-hour midnight feeding.
  • Alter feed particle size, either by increasing it or by feeding a crumble diet. With crumble diets in laying flocks, a supplementary source or presentation of large particle limestone is recommended.
  • Formulate diets using highly digestible materials, particularly protein sources. Metabolism of excess protein is particularly heat-loading on the bird. Formulate to digestible amino acid targets and do not apply a high crude protein minimum in the formula. Synthetic amino acids can reduce crude protein in the diet without limiting amino acid levels.
  • Increasing the proportion of energy contribution from highly digestible lipid, rather than starches or proteins, will reduce the body heat production resulting from digestion. This is known as heat increment and is lowest with the digestion of dietary fat.
  • The bird’s metabolizable energy requirement decreases as ambient temperature increases to above 21°C, resulting from a reduction of energy requirements for maintenance. The energy requirement will decrease with the rise of temperature up to 27°C, above which it will start to increase again since the bird needs additional energy for panting to reduce body heat.

Stress Management Schedule

Management schedule during times of heat stress

Water management

During periods of high environmental temperature, birds have a high demand for drinking water. The water-to-feed consumption ratio is normally 2:1 at 21°C but increases to 8:1 at 38°C. Adequate drinking water must be available to heat-stressed flocks. Ensure that drinkers have sufficient water flow (>70 mL/minute/nipple drinker). If water flow is less the lines need to be checked for flow restriction. If there’s a build-up of iron and other minerals, it needs to be removed. Don’t forget to routinely check water filters and replace them as needed.

It’s easy to overlook a non-functioning drinker here and there; drinkers must be systematically checked to make sure they’re all working. For floor-reared flocks, providing additional drinkers can help accommodate the increased water consumption.

During hot weather, you need to ensure your water system can accommodate the bird’s increased water consumption, and the additional water demands for foggers, evaporative cooling systems and roof sprinklers. The availability of drinking water to a heat-stressed flock should never be compromised.

Cool water temperatures (<25oC) will encourage the birds to drink and reduces the birds’ core temperature. Flush water lines and waterers routinely to keep the water fresh and cool, increasing water consumption, and sustaining egg production. If available, ice can also be added to header tanks. When mechanical cooling systems fail, water flushing can serve as an emergency measure during heat stress.

Drinking water from overhead water tanks can become hot if exposed to direct sunlight. These water tanks should be a light color, insulated and covered to avoid direct sunlight. Water tanks are ideally placed inside the house or underground. Water pipes in the house should not be installed close to the roof to avoid heat from the roof warming up the water in the pipes.

Eggs

Water Cooler
Having the water tank inside the house (above) or light-colored and covered to avoid direct sunlight (below) keeps the water cooler

Use vitamin (A, D, E and B complex) and electrolyte supplements in the drinking water to replenish the loss of sodium, chloride, potassium, and bicarbonate in the urine. Electrolyte supplements are best used in anticipation of a heat stress period and can be added to drinking water for up to 3 days.


Coping with evolutions in the performance and nutritional requirements of layers

LAYERHennen Auf Hof

Dr. Vitor Arantes, Global Technical Services Manager and Global Nutritionist, Hy-Line International – Conference Report

The layer industry has gone through significant changes during the past decades and has a remarkable capacity to cope with new challenges. Dr Vitor Arantes, Global Technical Services Manager and Global Nutritionist, Hy-Line International, noted that increased egg production, improved feed efficiency, and adaptation of egg quality and bird welfare to consumer preferences have contributed significantly to the success of the egg industry. However, continuous improvement in egg production per hen housed is the most important selection criteria in layer breeding.

Egg producers needs include:

  • More saleable eggs,
  • Eggshell quality,
  • Easier behaviour
  • Housing systems
  • Egg size specifics
  • Sanitary / environmental challenges
  • Profits through productivity

Primary breeders can deliver these producer needs through:

  • Having the correct product for each country
  • Constant follow up
  • Local presence, trust relationship
  • Accurate data collection
  • Critical data analysis
  • Understand the company’s goals
  • Customized technical services according to each customer needs

How has genetics changed?

Examples of genetic progress in layers from 1984 to 2022 cited by Dr Arantes include:

  • Higher persistency (+30 weeks >90%)
  • Higher egg mass (+5.5 kg/hen housed)
  • Smaller hen (-21% mature body weight)

Dr Arantes states the record clutch size, defined as the unstopped length of individual egg production on a daily basis, was an amazing 474 days for a White Plymouth Rock hen. This genetic progress necessitates adjustments in nutrition and management.

Layers weeks

As shown below, growth and organ development occur at various ages. “There is no margin for mistakes – a lack of growth during a stage could have a detrimental impact on pullet quality and subsequent production,” stressed Dr Arantes.

Multi-phasic growth and development during rearing and start of lay

System Age (weeks) Consequence
Gastrointestinal 0-6 Shorter intestinal tract/reduced nutrient absorption
Immune 0-6 Flocks more susceptible to disease challenges
Skeleton 6-12 Shorter frames/less calcium reserves
Muscle 6-12 Impact in persistency of production
Fat >12 Excess can lead to fatty liver, prone to prolapse and mortality

 0-6 weeks of age

Most of the development of the organs of the digestive tract and the immune system occurs during the first 6 weeks of age. Problems that occur during this period can have negative effects on the function of these systems. Birds stressed during this period may have lifelong difficulties in digesting and absorbing feed nutrients. Immunosuppression may also result from problems during this period, leaving the bird more susceptible to diseases and less responsive to vaccinations.

6-12 weeks of age

Most of the adult structural components – muscles, bones and feathers are obtained during the period of rapid growth that occurs at 6-12 weeks of age. Growth deficiencies during this period will prevent the bird from obtaining sufficient bone and muscle reserves, which are necessary to sustain a high level of egg production and to maintain good eggshell quality. About 95% of the skeleton is developed at the end of the bird’s 13 weeks of life. At this time, the plates of the long bones become calcified and further growth in bone size cannot occur.

12-18 weeks of age

During this period, the growth rate slows, and the reproductive tract matures and prepares for egg production. Muscle development continues and the proliferation of fat cells takes place. Excessive weight gain during this period can result in an excessive amount of abdominal fat. Low body weight and stressful events at this time can delay the start of egg production. From 7-10 days before oviposition of the first egg, the medullary bone that is located within the cavities of the long bones can be increased by feeding the bird a pre-laying ration with higher levels of calcium than the development stage.

Bodyweight is a key factor for flock management as this will influence future performance of birds. Consequently, bodyweight should be controlled during the whole life of the layer flocks. Management, in particular nutrition and lighting programs, can help to control bodyweight so birds can achieve their genetic potential.

Uniformity

Uniformity is the most important KPI in our business. However, with the trend towards larger flocks, maintaining uniformity is becoming more challenging. With larger flocks, it is difficult to source one unique flock which thus usually comprises multiple breeding flocks of different ages. Inevitably, uniformity will be poor, hence the need for tools to address unexpected issues. Lack of uniformity becomes a self-perpetuating cycle – dominant versus dominated.

Many egg producers use average body weights compared to the breeder recommendations as a guide to flock status. However, knowing if you have good body weight uniformity is another valuable management tool. In any flock some birds are lighter or heavier than the average body weight. Poor uniformity makes management decisions, such as lighting, feed amounts or diet phase more difficult.

Ideally, the body weight coefficient of variation (CV) should be +/-10% of the mean, increasing the likelihood that your management decision will be appropriate for most of the flock. Inappropriate diet changes, bird handling, vaccination and transfer can reduce uniformity. Flocks should be at 90% uniformity at the time of transfer to the laying facility. Body weight at point of lay significantly affected egg production and eggshell quality.

Grading into 2 or 3 sub-populations of different average bodyweights may be necessary so that each group can be managed in a way that will achieve good whole flock uniformity at the point of lay. The best predictor of future laying performance is the pullet’s body weight and body type at the point of lay.

Vision egg

Vision Egg is a custom diagnostic tool used to analyze data and emphasize flock performance to achieve the highest genetic potential from Hy-Line layers with recommendations connected to customer profitability. This growing, robust database includes data from over 1 billion hens strengthens our flock performance diagnostic tool for improved profitability for Hy-Line customers.

Hy-Line customers can take advantage of this opportunity by sending flock data to their regional business manager or technical service specialist. The information shared with Hy-Line is kept completely confidential.

Summary

The challenge is not egg numbers, stated Dr. Arantes, but saleable eggs. Correct body weight and high uniformity of the flock at point of lay will result in good performance over the laying period, with high peak production and good persistency of production and the production of good quality eggs. Management is the key factor to regulation of body weight during rearing and at point of lay.


How to mitigate formulation costs when ingredient prices are high

IMG

Conference Report

The price of corn and soybeans dictates the price of all other ingredients, including to some extent amino acids, stated Dr Steve Leeson Professor Emeritus, University of Guelph, Canada at the recent EW Nutrition Poultry Academy in Jakarta, Indonesia.

The big question is, when times get tough, can we reduce safety margins and still get good performance?, asked Dr Leeson. “When we formulate diets, we build in some insurance. But so do the breeding companies in their recommendations.  For sure, reducing safety margins takes us out of our comfort zones, but we need to be nutritionists, not mathematicians,” he stressed.

Protein and energy are now expensive. As a result of this economic pressure, there is a focus on strategies to reduce feed costs and improving the production efficiency and profitability of poultry enterprises. Feed cost/kg body weight gain is not always at the lowest feed:gain.

To help achieve these targets, Dr Leeson discussed feeding and management strategies that take into account the cost mitigation requirement.

Optimize current digestibility/efficiency

With high feed prices, it is especially important to review the use of feed additives that optimize nutrient release and improve ‘digestibility’. The most obvious class of such additives are the various exogenous enzymes that improve the availability of phosphorus, energy, and amino acids. In most instances, these different classes of enzymes are additive in terms of nutrient release, since they have different target substrates or modes of action. All too often, the position is taken that “I take energy uplift from my amylase, so I can’t expect energy release from phytase or protease”.

The energy release from phytase is invariably net energy related to removal of the phytate molecule, which in effect is an ‘antigen’ and takes energy to counter its negative effects. The energy release from an amylase, however, is obviously related simply to the improved digestibility of carbohydrate complexes. Similarly, a protease enzyme will always provide energy, since all protein/amino acids are eventually used for energy during protein turnover, hence our use of the often forgotten ‘n’ in AMEn. We also have the choice of enzyme concentration, especially for phytase, which in the current economic solution is likely to be close to 2 – 2.5 doses, assuming a single dose is around 500-600 FTUs. The economics of super-dosing or mega-dosing is greatly impacted by the cost of the enzyme.

The response of phytase varies with individual amino acids, and with ingredients, with greater responses with ingredients of lower inherent digestibility. Generally, Dr Leeson suggests that a protease will capture 20% of indigestible amino acids. For example:

  • 70% digestibility = +6% uplift
  • 90% digestibility = +2% uplift

Relax ingredient constraint maximums

Probably the greatest current cost savings can be made from relaxing the maximum levels on ingredients. While corn and soybean meal levels are usually without restriction, we often impose limits on the upper levels of ‘alternative’ ingredients such as distillers grains, rice by-products and rapeseed/canola meals, etc. When the upper levels are reached in the formula, this suggests cost savings from using higher levels. Current restraints are based on past knowledge of perhaps variable nutrient composition and so the decision to use more of any ingredient must be based on past knowledge of on-going quality control assays. Although we can achieve considerable detail today in such QC assays, monitoring for (consistency of) crude fiber, crude protein, fat, and moisture alone, provide a sound basis for decisions on whether to use more of an individual ingredient.

Source alternate ingredients

Another option is to consider ‘new’ alternative ingredients. In reality, however, there are no new ingredients as such, since all monogastric nutritionists around the world have only around 19 ingredients available in sufficient quantities to sustain large-scale modern feed mills. There are certainly smaller quantities of specialised local by-products that can be used to advantage, yet these are becoming scarce. Therefore, an ingredient is only novel to you, since inevitably the same ingredient has been used for many years in other regions. As such, there is a wealth of information available on the nutritive value of these ‘new’ ingredients that can be simply transposed to our formulation matrices.

The bird is very adaptable to new ingredients, in fact it is more responsive to nutrients. Unless there are toxins, antinutritional factors, or other negative factors, it doesn’t matter to the bird. Knowing the ingredient composition is the critical feature regarding the success or failure with new ingredients.

Reduce nutrient density

Both layers and meat birds still eat quite precisely to their energy requirements. They are amazingly adaptable to a vast range of nutrient densities, assuming that they can eat enough feed as the lower levels of feed energy are approached. Success in using lower levels of nutrient density is invariably negatively impacted by factors such as high stocking density and a high environmental temperature. Conversely, reducing diet energy usually has the hidden advantage of improved pellet quality.

The key to successful use of lower energy diets lies in prediction of change in feed intake and corresponding adjustment to all other nutrients in the diet.

Flexible cost of Dietary electrolyte balance (DEB)

When first introduced in the 1970s, maintaining DEB around 250MEq was seen to optimize broiler performance, especially leg condition. There is now less emphasis on this, perhaps because of genetic selection for skeletal integrity. DEB, however, may be important during heat stress to stimulate water intake and control manure moisture. Formulating to fixed DEB levels always adds costs. Instead, Dr Leeson suggested to focus on sodium and chloride at a ratio of 1:1.3.

Optimize feed texture (pelleting)

The first consideration is to make a good quality pellet, then worry about pellet size, noted Dr Leeson. He also added he was “a big fan of sunflower meal – it’s great for pellet quality.”

When given a choice in particle sizes, birds invariably show a preference for the largest particles. This situation becomes obvious when ‘fines’ accumulate in the feeder pans over time. As shown below, as pellet size increases, so does the bird’s need to consume fewer pellets. As a result, they need to spend less time at the feeder. Naturally, this idealised pellet size must be balanced against the willingness of mill managers to accommodate the necessary changes in pellet die size. Matching pellet size to bird age becomes critical as stocking density increases.

Impact of pellet size on pellet number consumed by a 30-day-old broiler

Pellet size (diameter) 4 mm length 6 mm length
3 mm 580 390
4 mm 330 220
5 mm 210 140

In the end, cost mitigation should not require complex mathematics. Nutritionists should be able to play with several types of improvements without affecting health and performance.


***

EW Nutrition’s Poultry Academy took place in Jakarta and Manila in early September 2023. Dr. Steve Leeson, an expert in Poultry Nutrition & Production with nearly 50 years’ experience in the industry, was the distinguished keynote speaker.

Dr. Leeson had his Ph.D. in Poultry Nutrition in 1974 from the University of Nottingham. Over a span of 38 years, he was a Professor in the Department of Animal &Poultry Science at the University of Guelph, Canada. Since 2014, he has been Professor Emeritus at the same University. As an eminent author, he has more than 400 papers in refereed journals and 6 books on various aspects of Poultry Nutrition & Management. He also won the American Feed Manufacturer’s Association Nutrition Research Award (1981), the Canadian Society of Animal Science Fellowship Award (2001), and Novus Lifetime Achievement Award in Poultry Nutrition (2011).